

In my lab, I have VMware ESXi hosts and I just want to deploy the Nano Server as a Virtual Machine so that I can play around with it, which is why the title of the article is how to install Windows Nano Server on VMware ESXi!
Before we proceed further, let us look at the prerequisites required for how to install Windows Nano Server on VMware ESXi host:
- Windows Server 2016 ISO image.
- VMware Tools (10.0.9 version, x64 bit)
- WinImage software
Once the Windows Server 2016 ISO is downloaded from the Microsoft Evaluation Website, extract the contents using a software like WinRAR and see the files.
There will be a folder called NanoServer and within that folder, there is another directory called NanoServerImageGenerator which contains the PowerShell commands to create the Nano Server image in vhd format.
I have copied the content of the ISO to a folder called Server2016 in C:\TEMP folder on my desktop.
The second prerequisite is to get the latest vmxnet3 and pvscsi drivers so that we can use the Windows Nano Server on a VMware ESXi host.
I haven’t been successful in getting it work with the version above 10.0.9, which is what I will be using here. If anyone out there has been successful, please leave a comment.
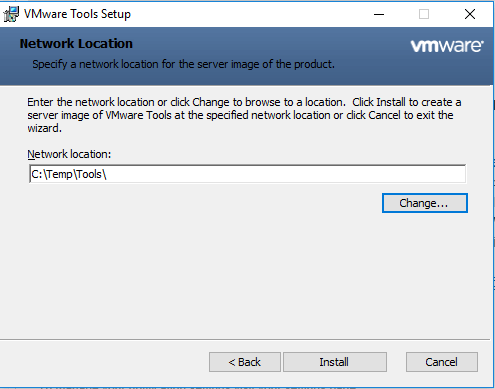
I have already downloaded the VMware Tools 64-bit version to C:\TEMP\Tools location on my desktop. Run the below command so that we can extract the contents of the exe file after changing into the directory C:\Temp\Tools
.\VMware-tools-10.0.9-3917699-x86_64.exe /a
/a parameter will present a screen that will let you provide the path where you can extract the contents of the exe file as seen below.
Once the extraction completes, we will create a directory called Drivers in C:\Temp and copy the drivers for vmxnet3 and pvscsi from the extracted files. Run the below commands to copy the files.
mkdir C:\TEMP\Drivers
cd “C:\TEMP\VMTools\VMware\VMware Tools\VMware\Drivers”
Copy-Item .\pvscsi\* C:\Temp\Drivers\
Copy-Item .\vmxnet3\NDIS6\* C:\Temp\Drivers\
Now that we have everything setup correctly, we will need to create the vhd image using the function provided with the Windows Server ISO image. To do so, import the Module by running the command.
Import-Module C:\Temp\Server2016\NanoServer\NanoServerImageGenerator
Once the module has been imported, run the below script which will create a Nano Server image in vhd format called Nano01 and inject the drivers we extracted in the previous step.
New-NanoServerImage -MediaPath C:\Temp\Server2016 -BasePath C:\Temp\Base -TargetPath C:\Temp\Nano01.vhd -ComputerName Nano01 -EnableRemoteManagementPort -DriverPath C:\Temp\Drivers -AdministratorPassword (ConvertTo-SecureString -String “VMware1!” -AsPlainText -Force) -DeploymentType Host -Edition Datacenter
Let us now look at the Parameters that were part of the above command:
- MediaPath: Path where in the Windows Server 2016 ISO contents that were extracted.
- BasePath: Temporary writable build directory.
- TargetPath: File path where the output file will be generated. Options available are vhd, vhdx, and wim.
- ComputerName: Computer Name that will be assigned to the generated vhd file.
- EnableRemoteManagementPort: Since Nano Server is headless, the only way you manage it is using PowerShell. This parameter will enable Remote Management capabilities using the WinRM service.
- DriverPath: Any new drivers that need to be injected into the image at the time of creation.
- AdministratorPassword: Password for the default Administrator user account.
- DeploymentType: There are two options that are available, which are Host and Guest. Guest is usually used when you are testing the image with Hyper-V and it installs the drivers that are required. We are using Host since we will be installing this image in VMware ESXi host.
- Edition: Two types available, Datacenter and Standard.
There are more parameters available with the New-NanoServerImage command which can be looked at running Get-Help against it.
According to me, the above parameters are the bare minimum required to be able to install Windows Nano Server on VMware ESXi host.
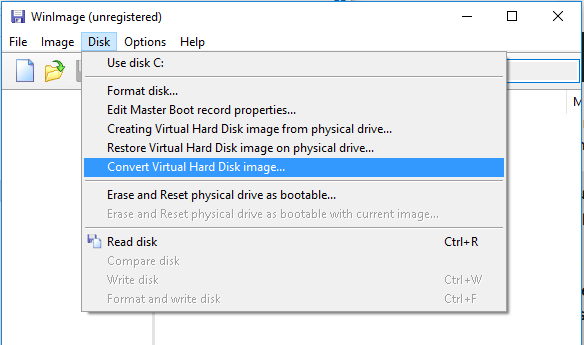
As mentioned before, the image generated by using the command will be in vhd format. For VMware, the image needs to be converted to a vmdk file.
We will be using the WinImage tool, to convert the file format. Open the tool, click Disk > Convert Virtual Hard Disk image > select the Nano01.vhd file and convert to vmdk file.
Read More: Free tools to convert vhd to vmdk
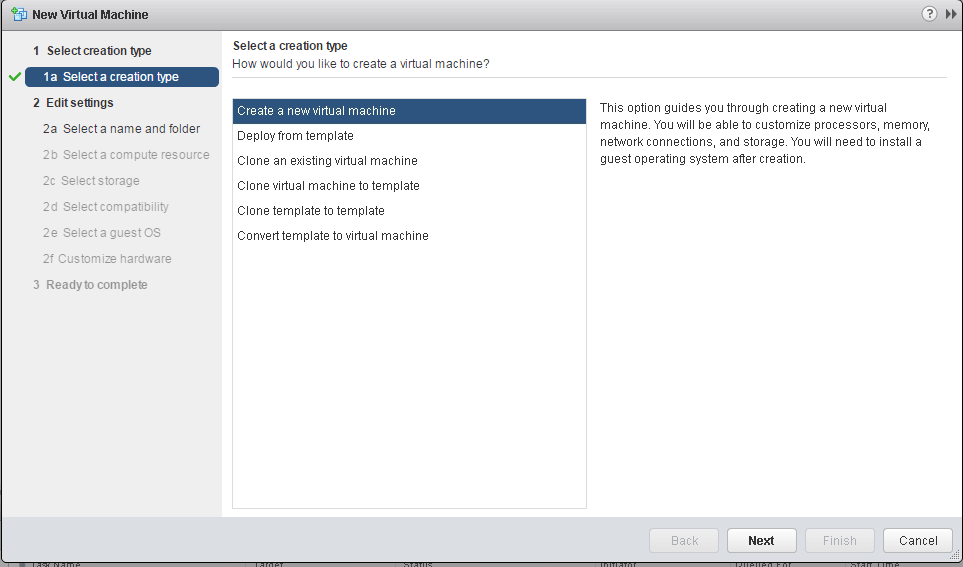
Once the image is converted, upload both the flat.vmdk and .vmdk file (descriptor) to one of the datastores and create a New Virtual Machine.
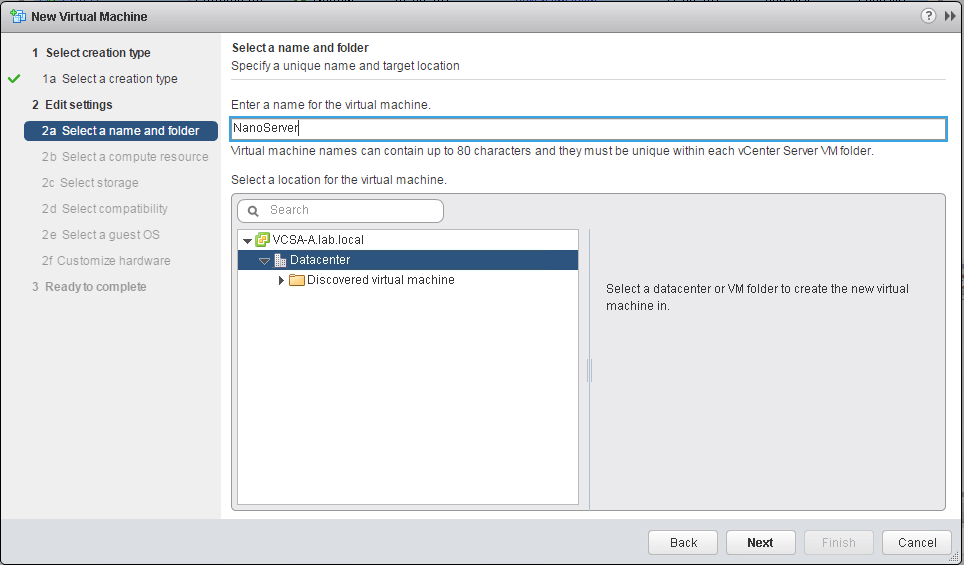
Provide a name to the Virtual Machine and select where the VM needs to reside.
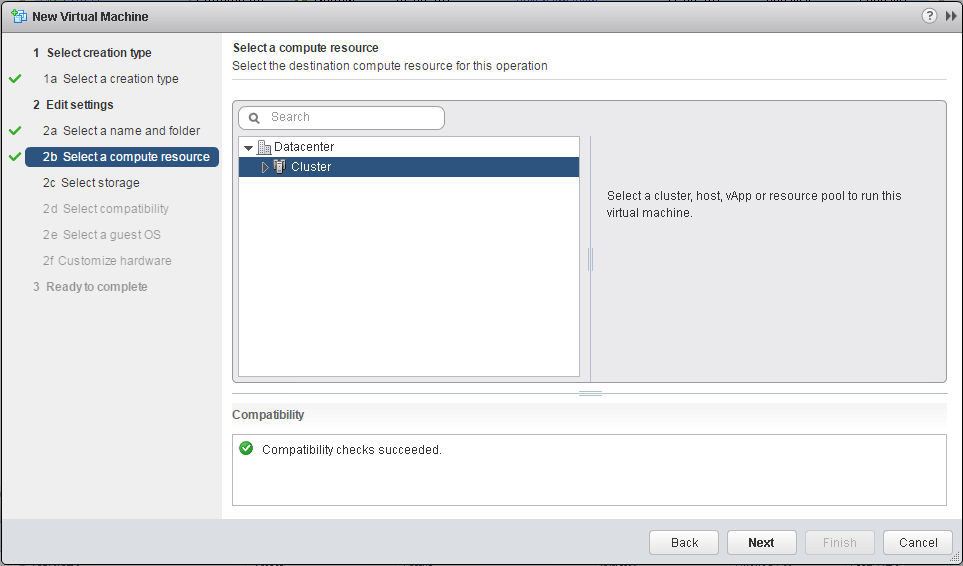
Select the Compute Resource and click Next.
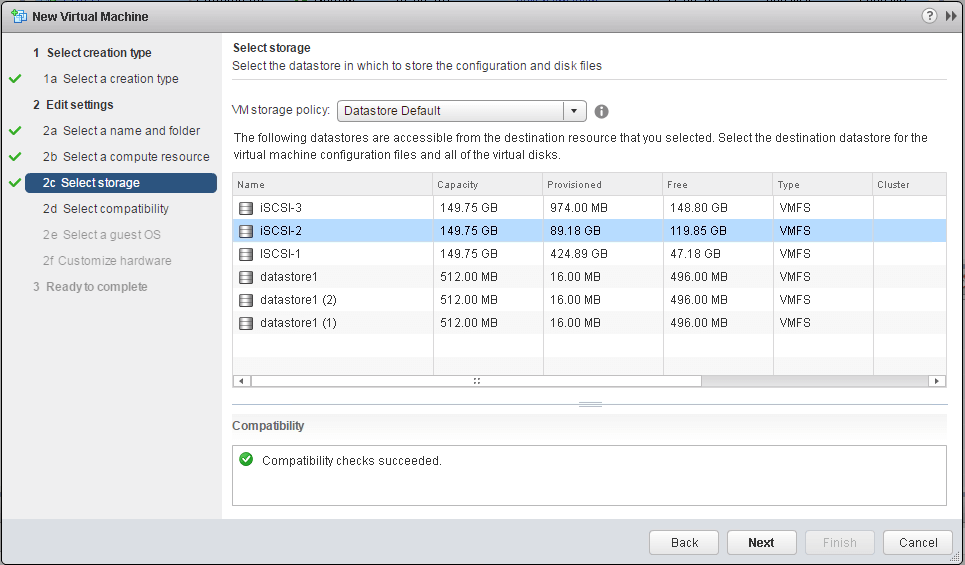
Select the Datastore where you want to store the VM.
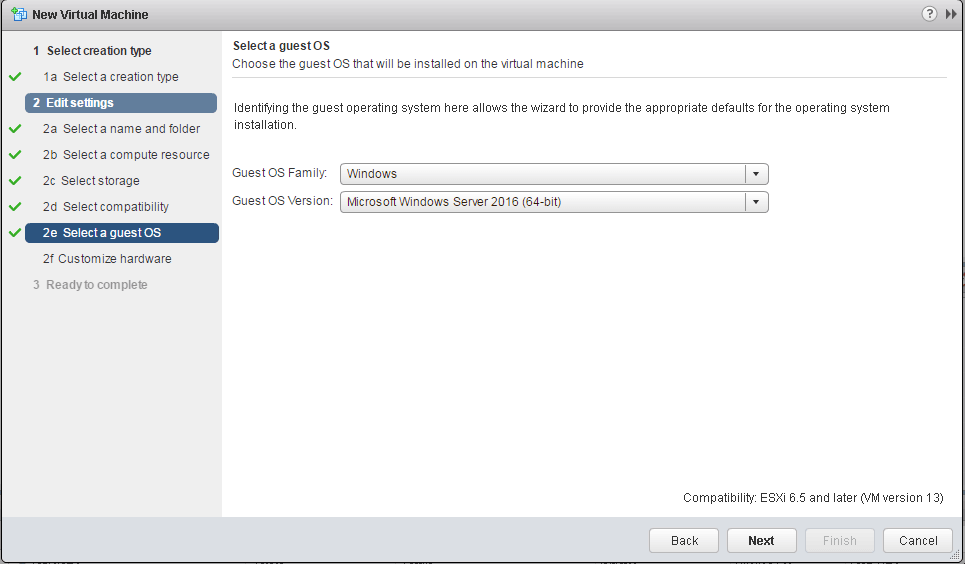
Select the guest OS type, Guest OS Family > Windows, Guest OS Version > Microsoft Windows Server 2016.
Change the Network Adapter to use vmxnet3 adapter. The default Network Adapter selected is E1000e, so be sure to change this, otherwise, the network adapter will not be detected within the Nano Server.
Also, change the SCSI controller from LSI logic to VMware Paravirtual, otherwise, the disk will not be detected and the OS will not boot.
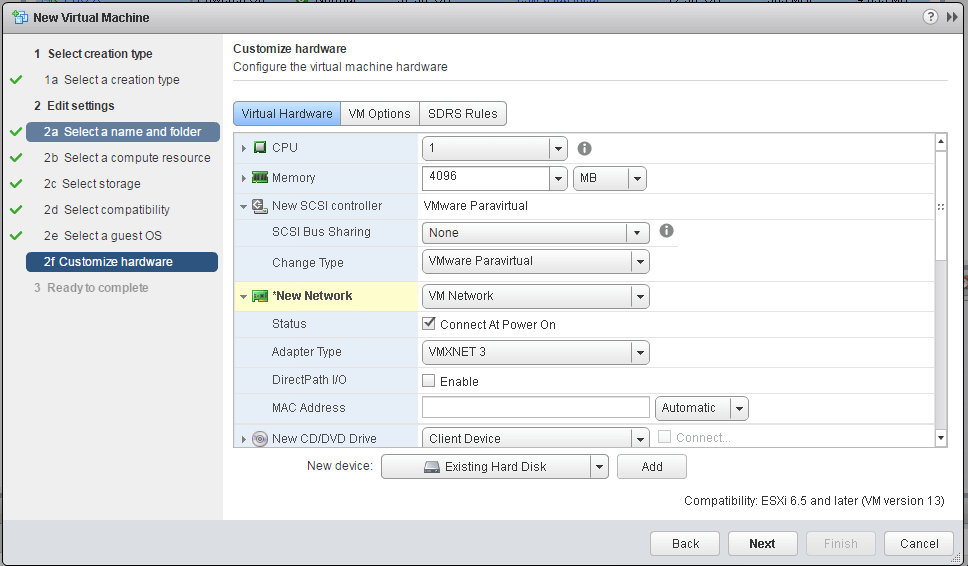
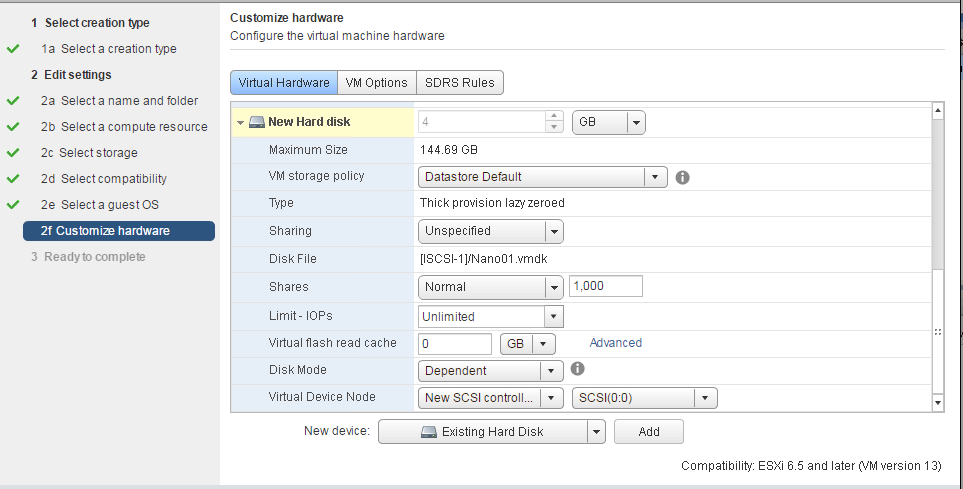
Remove the drive that was created by the Wizard, and add the uploaded vmdk to the VM using the Add Existing Disk option. Be sure to select the legacy SCSI controller.
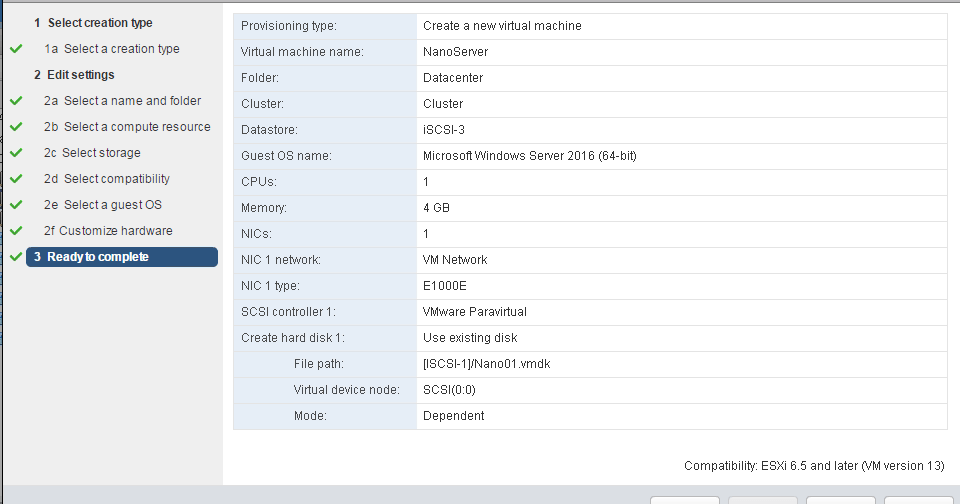
Review the settings and Finish creating the Virtual Machine.
Once the VM is created, power ON the VM and you will see the Nano Server boot up. In the upcoming articles, we will talk about how to manage the Nano Server and perform various other steps.
Got a project that needs expert IT support?
From Linux and Microsoft Server to VMware, networking, and more, our team at CR Tech is here to help.
Get personalized support today and ensure your systems are running at peak performance or make sure that your project turns out to be a successful one!
CONTACT US NOW