Dynamic Host Configuration Protocol (DHCP) is a network protocol used in Internet Protocol (IP) networks. The DHCP server automatically distributes IP for network interfaces and devices. When somebody sends a request for IP, instead of a network administrator, DHCP server distributes IP address, based on the DHCP server configurations. Here’s how to install DHCP Server on windows server no problem if you’re using windows server 2012 or 2012 R2 or 2016, it works on all the windows server above windows server 2008. Hope you enjoy it.
Install DHCP Server on Windows Server 2016
1. Before installing the DHCP server role on your computer, you need to assign a static IP address on your server. For the purpose right-click on the
Network icon on the Desktop. and select Properties. On the top-right side click on the network card.
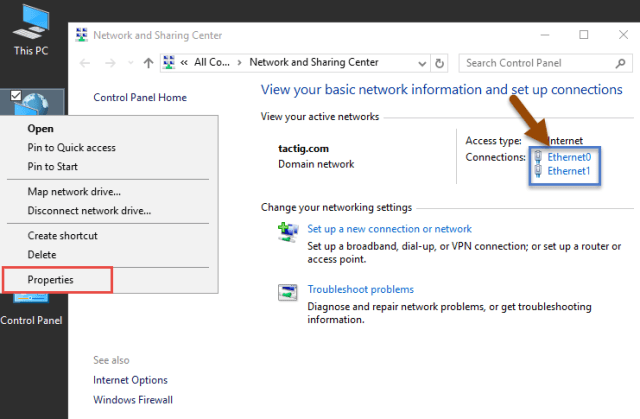
2. Click on the Properties button.
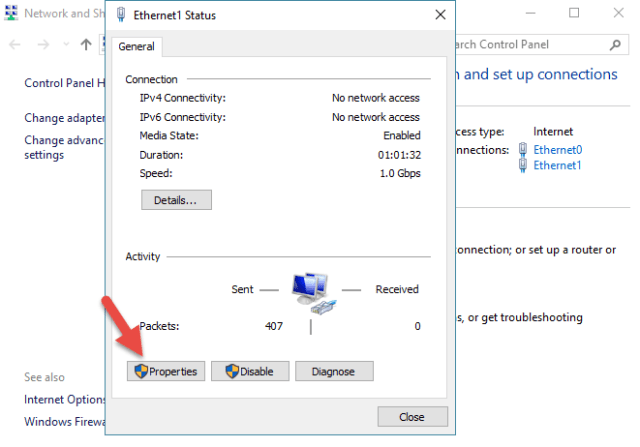
3. Select Internet Protocol version 4, click on Properties button, when a new window opens, enter this IP address: 192.168.10.1 , and DNS Server and click Ok.
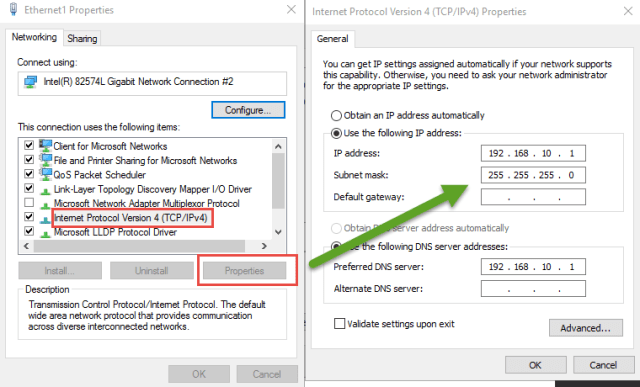
Now your server is ready for DHCP role installation.
4. Now open Server Manager tool and click on the Add role and features.
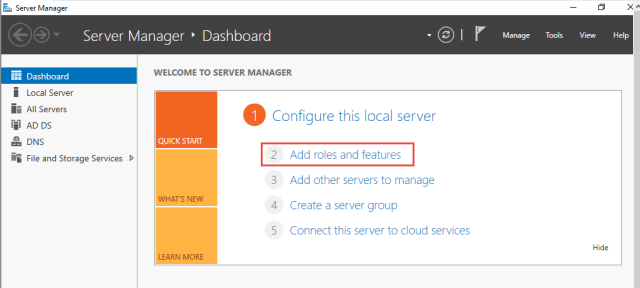
5. Skip the Before you begin page clicking on the Next button. On this page, select the server that you want to use it as DHCP server.
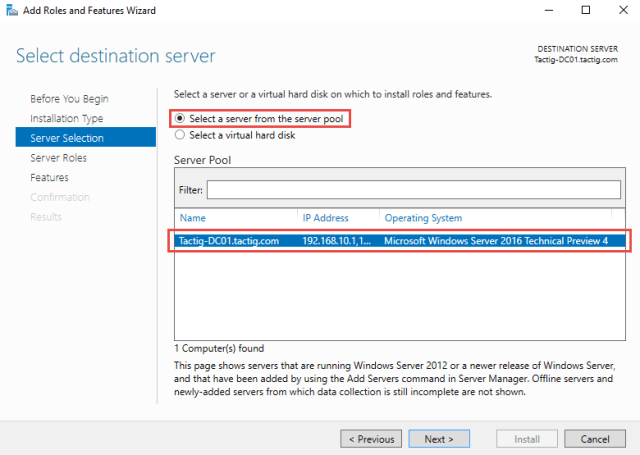
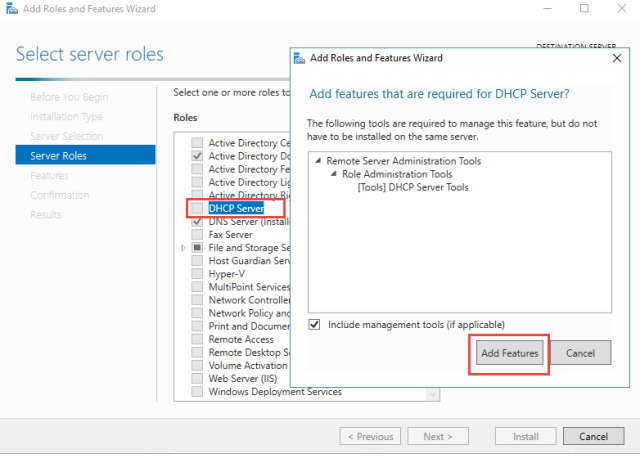
6. Select the DHCP Server role for installation. When a new window opens and asks you for permission to install more needed features, in order to work the DHCP server correctly, click on the Add Features button then click on the nextbutton.
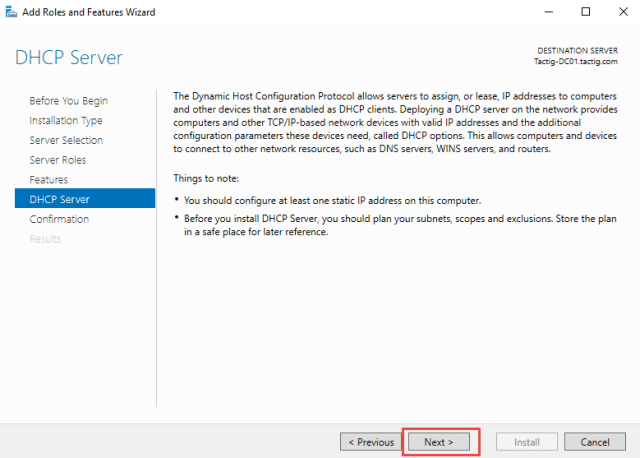
7. No additional feature is needed to be installed, click on the Next button. DHCP Server page gives you some critical information about DHCP server. Read the information and hit Next.
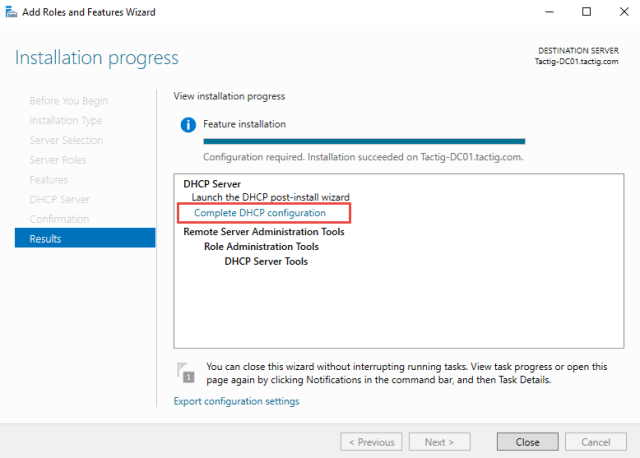
8. Installation Confirmation page gives you the option to install the role. Click on the Install button. It takes some time, the role to be installed on your server. When the installation finished, click on the Complete DHCP Configuration for DHCP configurations.
Conclusion: The installing the DHCP server reaches to the end.


