Configuring your RAID through the PERC BIOS is a pretty quick process. This tutorial will show you how to create a Virtual Disk and HERE is how to delete a Virtual Disk.
This tutorial applies to: Dell PERC 5/E, 5/i, 6/E, 6/i, H300 series, H700 series, and H800 series
Boot into the RAID Controller BIOS by pressing “Ctrl-R” during POST
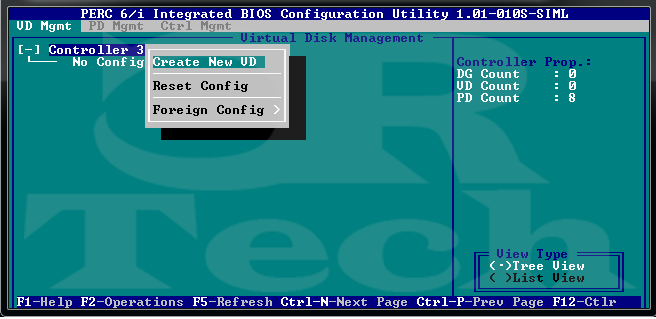
Once it is loaded, select your controller under VD Mgmt and press F2 to bring up the option window. Highlight Create New VD and press Enter.
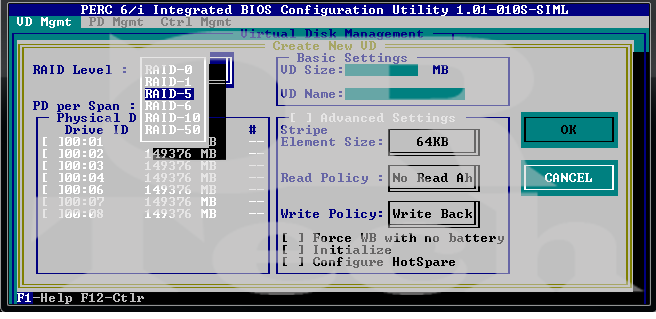
Select the RAID level for your new Virtual Disk by highlighting RAID Level and pressing Enter on the RAID of your choosing.
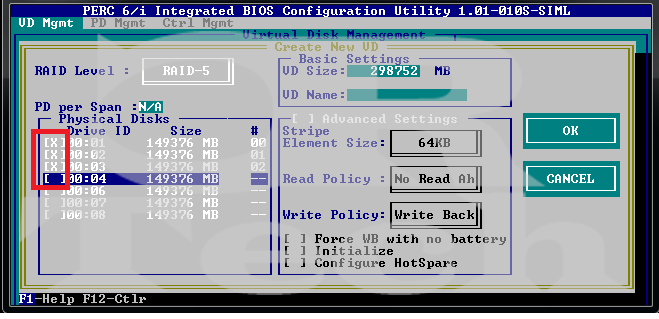
Check the HDD boxes in the Physical Disks pane that you want in your new RAID.
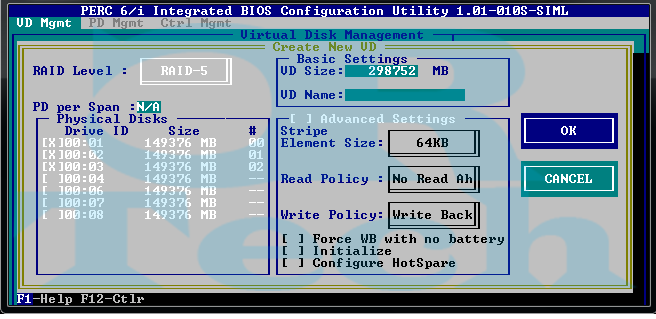
I would recommend changing the VD Name to OS or Data (or whatever the RAID is used for). Keep the defaults on the other settings and then highlight OK and press Enter
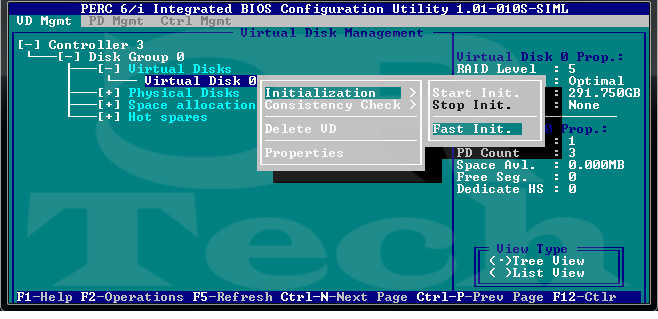
You will see your new Virtual Disk created on the VD Mgmt tab. Use the arrow keys to navigate to the virtual disk name and press F2. This will bring up an option window that will allow you to initialize the Virtual Disk. Highlight initialization then press the down arrow for the Fast Init. option and press Enter.
Press OK when prompted to begin your initialization
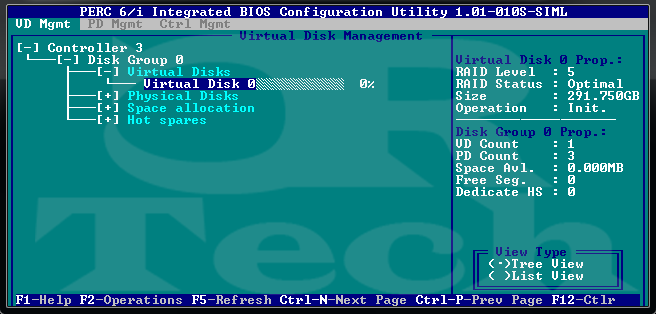
Note the percentage and the Operation Status on the right pane.
Got a project that needs expert IT support?
From Linux and Microsoft Server to VMware, networking, and more, our team at CR Tech is here to help.
Get personalized support today and ensure your systems are running at peak performance or make sure that your project turns out to be a successful one!
CONTACT US NOW

