Introduction
In my previous article, I explained that one of the best ways to secure wireless network traffic is to treat the wireless network as an unsecured medium. The idea is to authenticate anyone who is using the wireless network in a manner similar to the way that you would authenticate users who are connecting to your VPN. Windows Server 2008 can be configured to provide such authentication. To do so, you will have to configure Windows to act as a Network Policy Server.
Before I Begin
Before I show you how to configure a network policy server, I want to fill you in on the necessary prerequisites. As I explained in the previous article, the authentication process is certificate based. As such, you will need to either deploy an Enterprise Certificate Authority on your network in the manner described in the previous article, or you will need to acquire a certificate from a commercial certificate authority.
In addition, you should have an Active Directory environment set up and the server that you will be configuring as a Network Policy Server should be a domain member. Additionally, your network will require a DNS server (as all Active Directory environments do) and you will need a DHCP server.
Finally, it isn’t an absolute requirement but it is widely considered to be a best practice to install the Network Policy Server on a dedicated machine (physical or virtual). The idea is that if the Network Policy Server were to be compromised somehow, then you do not want the hacker to gain access to any other network services. On the other hand, if you are simply setting up a lab environment to try out the techniques that I am discussing then you can install all of the required components on a single server.
Deploying the Network Policy Server
To get started deploying the Network Policy Server, open the Server Manager and click on the Roles container. Now, click on the Add Roles link and Windows will open the Add Roles Wizard. When the Wizard begins, click Next to bypass the Wizard’s welcome screen. At this point, you will see a screen asking you which server roles you want to install. Select the Network Policy and Access Services role and click Next.
You should now see a screen introducing the Network Policy and Access Services role. Click Next once more and you will be prompted to choose the role services that you want to deploy. Choose the Network Policy Server role service as shown in Figure A, and click Next.
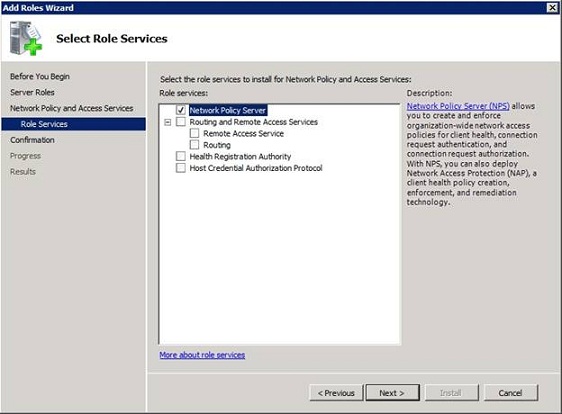
Figure A: Select the Network Policy Server role service and click Next.
The following screen presents a summary of the installation options that you have chosen. Take a moment to verify that everything appears to be correct and then click the Install button. When the deployment process completes, click Close.
Requesting a Certificate
Now that we have installed the Network Policy Services, the next step is to provide it with a certificate that it can use during the authentication process. Since we worked through the process of setting up an enterprise certificate authority in the previous article, I will show you how to issue a request from that certificate authority. The procedure that I will be using here is based on Windows Server 2008 R2. The actual steps involved vary slightly if you are using Windows Server 2008, but are relatively similar.
Begin the process by entering the MMC command at your Network Policy Server’s Run prompt. When you do, the server will load an empty management console. Pick the Add / Remove Snap-in command from the console’s File menu and then select the Certificates option from the list of available snap-ins and click the Add button. When prompted, tell Windows that you want to use the snap-in to manage certificated for the Computer account. Click Next, and then choose the Local Computer option and click Finish.
When you click OK, you should see the Certificates console. Navigate through the console tree to Certificates (Local Computer) | Personal, as shown in Figure B.
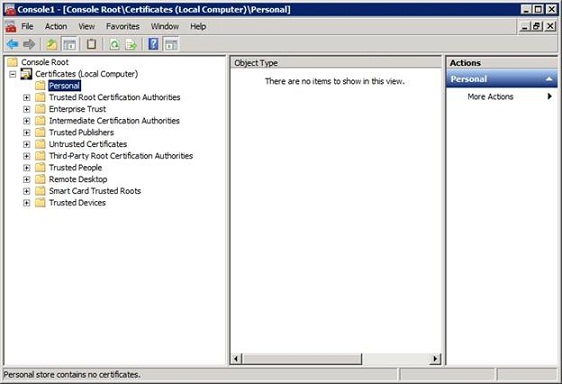
Figure B: Navigate to the Certificates (Local Computer) | Personal container.
Now, right click on the Personal container and choose the All Tasks | Request New Certificate options from the shortcut menu. This will cause Windows to launch the Certificate Enrollment Wizard. Click Next to bypass the wizard’s Welcome screen and you will be taken to a screen that asks you to choose a certificate enrollment policy. Accept the default value (Active Directory Enrollment Policy) and click Next.
The following screen will ask you what type of certificate you want to request. Choose the Computer option, as shown in Figure C, and then click the Enroll button.
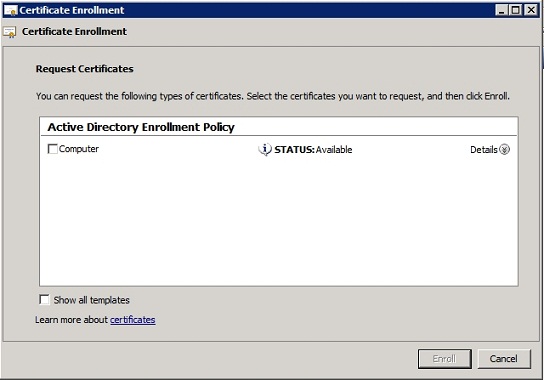
Figure C: Select the Computer option and click the Enroll button.
Registering the Network Policy Server
Now that the Network Policy Server has been provisioned with the necessary certificate, it is time to register the server in the Active Directory database. To do so, go to the Administrative Tools and open the Network Policy Server console. Now, right click on the console’s parent node (NPS (Local)) and then choose the Register Server in Active Directory command from the shortcut menu, as shown in Figure D.
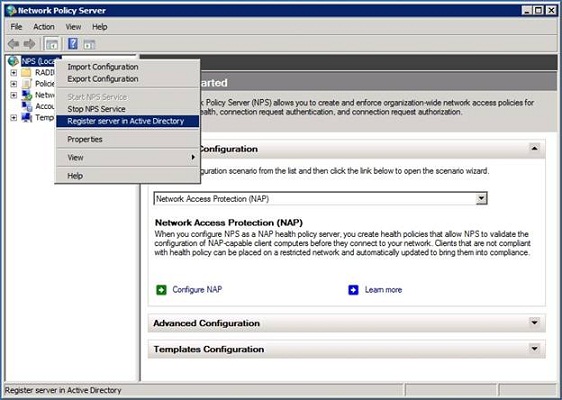
Figure D: You must register the Network Policy Server in the Active Directory.
When you attempt to register the server in the Active Directory, you will see the message shown in Figure E, explaining that in order for the Network Policy Server to be used for authentication purposes, it must be authorized to read user’s dial in properties from the domain. The dialog box then asks you if you want to give the Network Policy Server the required permissions. Go ahead and click OK. When you do, you will see a message like the one shown in Figure F informing you that the Network Policy Server is now authorized to read user’s dial in properties from the current domain. However, if you need to authenticate users from other domains, the Network Policy Server must be a member of the RAS / NPS Servers group for those domains.
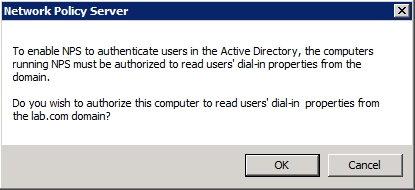
Figure E: The Network Policy Server must be able to read user’s dial-in properties from the Active Directory.
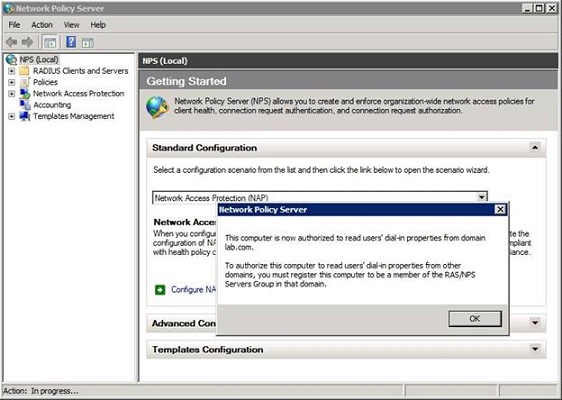
Figure F: The Network Policy Server is only authorized to read user’s dial-in properties from the current domain.
Conclusion
Now that we have registered our Network Policy within the Active Directory, we can begin configuring it to authenticate wireless access. I will show you the process for doing so in the next article in the series. In that article, we will be configuring the Network Policy Server to treat your wireless access point as a RADIUS client. Part of the process that will be involved in doing so involves establishing a shared secret that can be used by both the Network Policy Server and the wireless access point.
When the Network Policy Server is used to generate a shared secret, it sometimes produces strings that are longer than what a wireless access point can handle. This is a relatively easy problem to deal with, but it does require that you know the maximum shared secret length that your access point can handle. Therefore, I recommend checking out your access point’s limitations right now.
Got a project that needs expert IT support?
From Linux and Microsoft Server to VMware, networking, and more, our team at CR Tech is here to help.
Get personalized support today and ensure your systems are running at peak performance or make sure that your project turns out to be a successful one!
CONTACT US NOW

