Windows Server 2012 Core boasts many enticing enhancements which include reducing the installation footprint, attack surface and management overhead. Features on Demand allows the administrator to remove roles which are not needed to help reduce the disk size required for the installation. By default all features are stored in the %windir%\winsxs directory, but administrators can use the uninstall-windowsfeature <featurename> –remove command to delete the files associated with that feature from the winsxs directory.
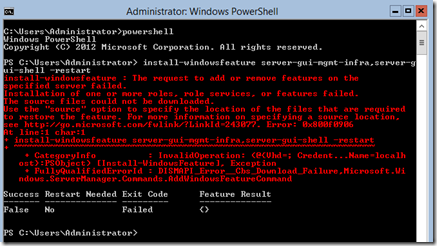
If you install Server Core edition or have removed the Server-Gui-Shell feature from Windows Server 2012 and want to convert to full GUI, you have some additional tasks that you will need to perform. I attempted to just execute the widely published PowerShell command to convert to full GUI and received the following message.
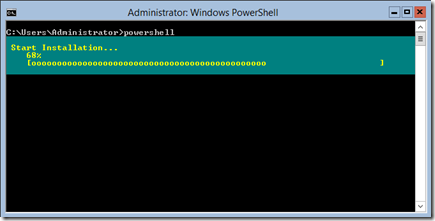
The installation froze for some time at this stage before showing the error message.


Error Message:
Install-WindowsFeature : The request to add or remove features on the specified server failed.
Installation of one or more roles, role services, or features failed. The source files could not be downloaded.
Use the source option to specify the location of the files that are required to restore the feature.
Error: 0x800F0906
The error message says it cannot find the source files to perform the installation.
I was building a new lab environment and didn’t have the ability to stage the installation files on the network, but that is an option. My environment was inside a Hyper-V environment on my Windows 8 system, so I needed to pull the files from the disk. As you know the installation files are located inside the /sources/install.wim file. To get the Full GUI running, I performed the following steps:
- Mount the Windows Server 2012 ISO to the host.
- open an administrative command prompt
- mkdir c:\mount
- check your wimfile to determine the correct index for the OS (mine was 4) -the command is dism /get-imageinfo /ImageFile:d:\sources\install.wim
- ‘dism /mount-wim /wimfile:d:\sources\install.wim /index:4 /mountdir:c:\mount /readonly
- powershell (enter PowerShell prompt)
- install-windowsfeature server-gui-mgmt-infra,server-gui-shell –restart –source c:\mount\windows\winsxs
- Unmount Wim (dism /unmount-wim /mountdir:c:\mount)
- Remove Mount Directory (rmdir c:\mount)
The seventh command will finish the installation and restart the server when complete. When the Install-WindowsFeature PowerShell command is executed and the server has internet access, the required files can be downloaded from Windows Update. Some of these features are very large, so specifying a network location or mounting the installation WIM, using the procedure above, may be the best alternative for installing removed features.
Got a project that needs expert IT support?
From Linux and Microsoft Server to VMware, networking, and more, our team at CR Tech is here to help.
Get personalized support today and ensure your systems are running at peak performance or make sure that your project turns out to be a successful one!
CONTACT US NOW

