This will be a basic setup using Windows 2008 Server to allow RADIUS and dot1x authentication. Steps for basic installation include:
- Rename the server
- Setting server as Domain Controller
- Installing Certificate Services
- Request Certificates (optional)
- Installing Network Policy Services (previously IAS)
- Creating Group Policies
Rename The Server
Something different about Windows 2008 Server is that the server name is auto-generated and you are not given a chance during the install to name the server so you must do before installing Active Directory or Certificate Services.
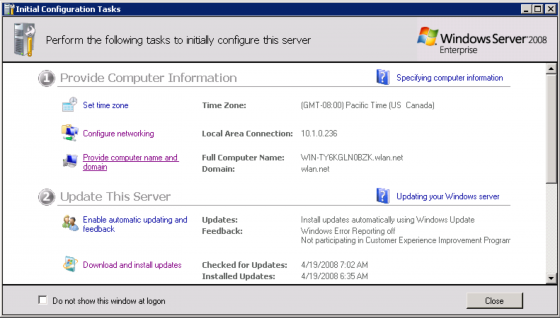
In the “Initial Configuration Tasks” window, click the “Provide computer name and domain” link.
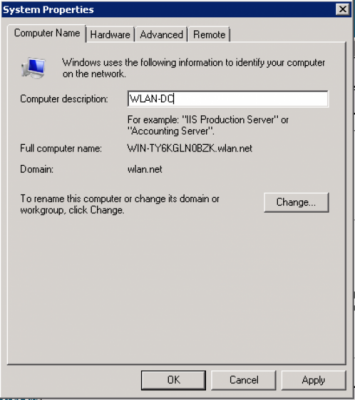
Enter a Computer description and click the “Change…” button to change the computer name. I’ll be using WLAN-DC as my name and description.
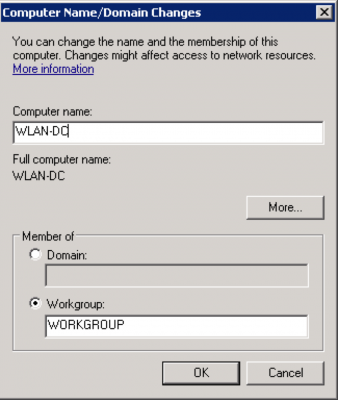
Enter the Computer name and click “OK” and reboot when prompted.
Setting Server as a Domain Controller
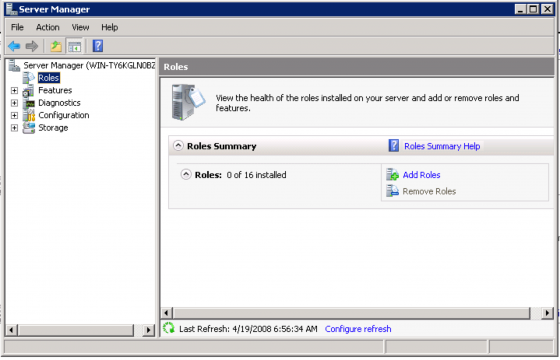
For this example we setup a new forest for the wlan.net domain. Server 2008 abstracts most server function into “Roles” so we’ll be adding the Active Directory Domain Services Role with the Server Manager by clicking “Roles” and clicking “Add Roles.”
Select the Active Directory Domain Services Role.
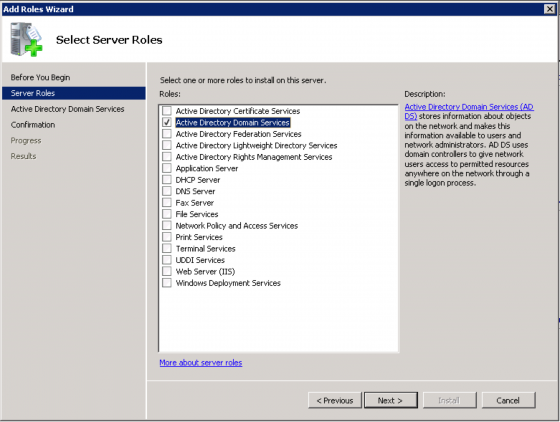
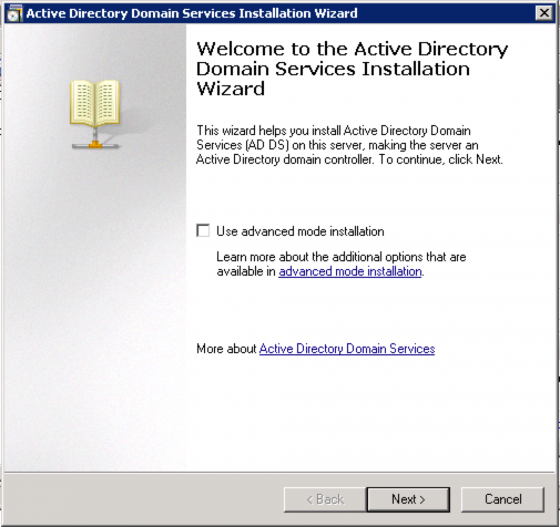
Click through the confirmation screens and click Install. You should get see an installation progress screen and finally an “installation success” message that asks you to run the command “dcpromo.exe” which will configure your domain. So click the link to run “dcpromo” or click the “Start” button, select “Run” and enter “dcpromo.exe”. You should now see the “Active Directory Domain Service” install wizard. Click “Next “ to continue.
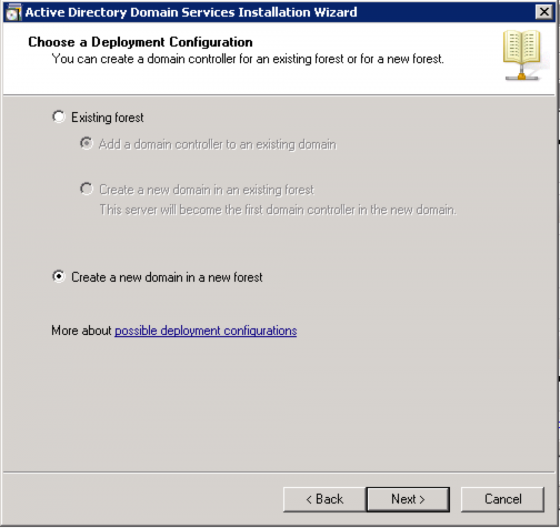
Choose “Create a new domain in a new forest” and click “Next”.
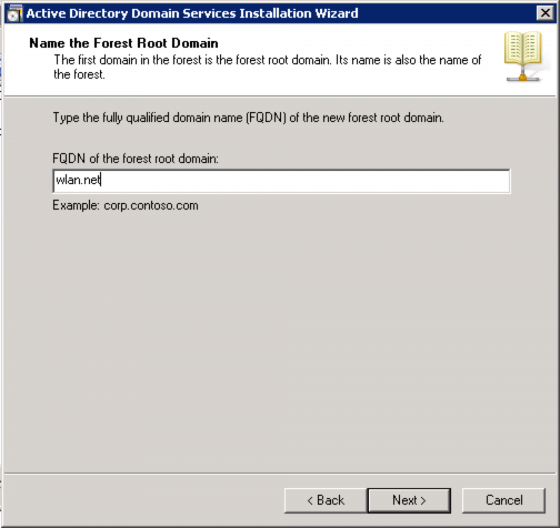
For our example domain we’ll use “wlan.net”. Click “Next” and it will check to see if the name is already used on the network.
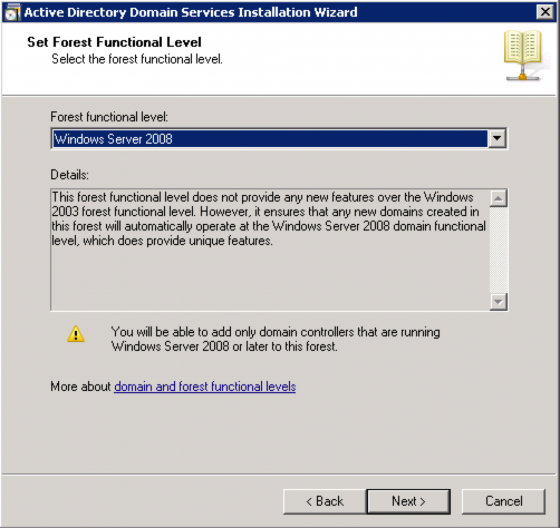
When asked to set which “Forest Functional Level” I used the 2008 level.
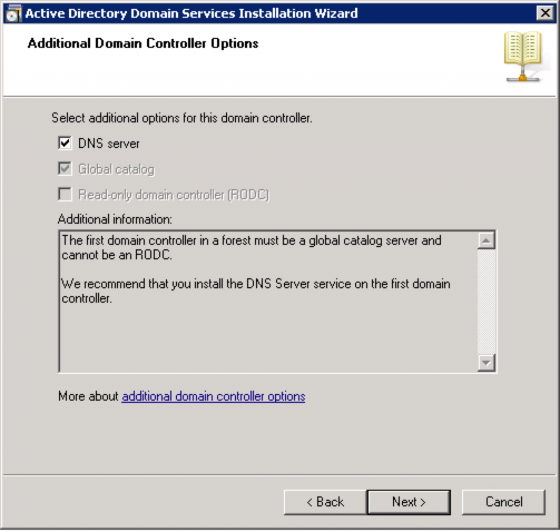
The next screen you’ll see is a warning that the DNS service isn’t install and will offer to install it for you. Just click “Next” to accept and install.
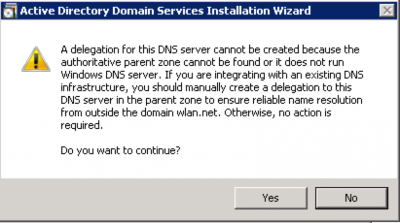
It will display the following warning, just click “Yes” to continue.
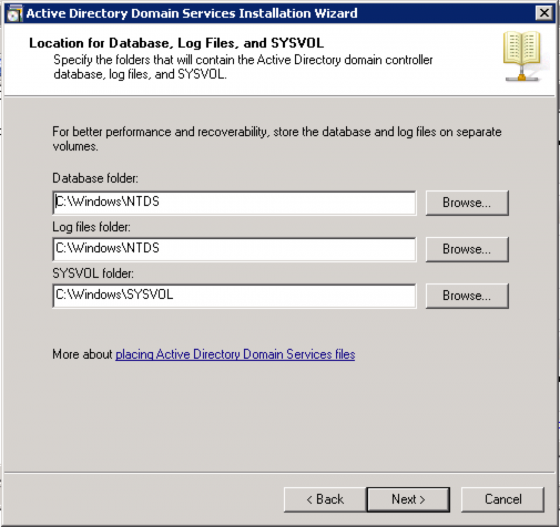
Just accept the defaults and click “Next”.
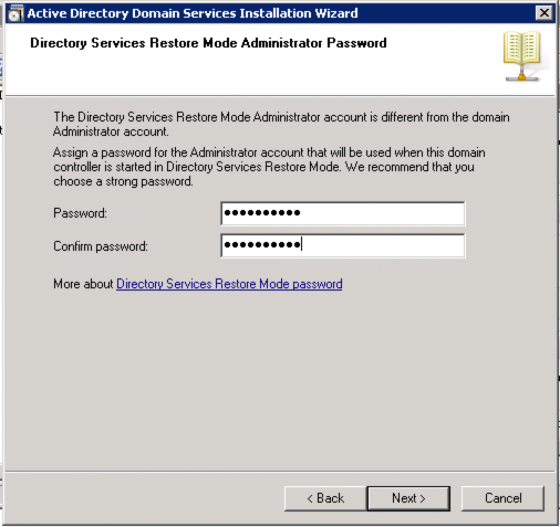
Now you’ll be prompted to enter a “Directory Services Restore Mode Administrator Password”. Enter a password and click “Next”.
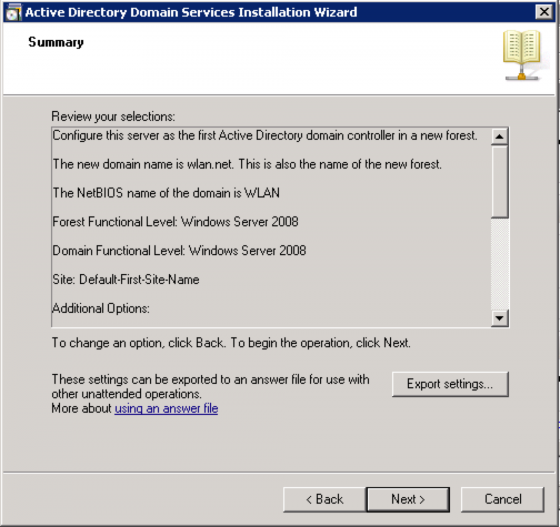
Click “Next” at the Summary screen.
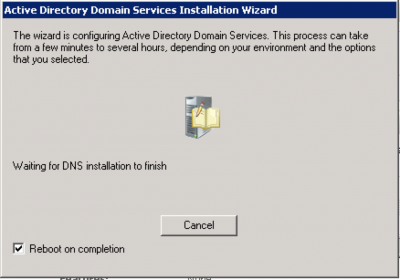
You’ll now see the Installation Wizard install DNS and Active Directory. Check the “Reboot on completion” box and once the wizard finishes it’ll reboot and be ready for the next step.
Installing Certificate Services
To enable PEAP or EAP-TLS we’ll need to install Certificate Services to enable a Certificate Authority (CA) to generate and sign certificates for our domain. Again, add a Role via the Server Manager and select “Active Directory Certificate Services” and click “Next”.
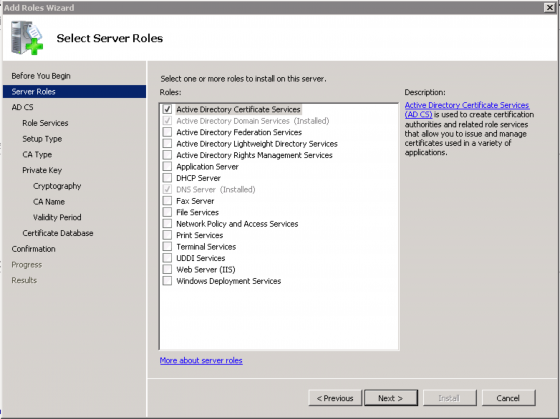
Click through the conformation screen and select “Certification Authority” and “Certificate Authority Web Enrollment” which will tell you that you’ll need IIS to be installed to use the “Certificate Authority Web Enrollment”. Click “Add Required Role Services” and click “Next” to continue.
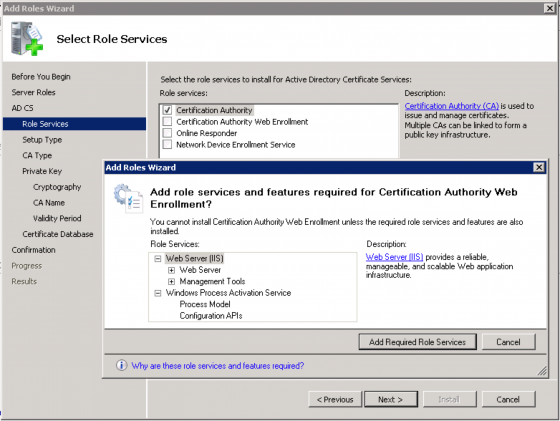
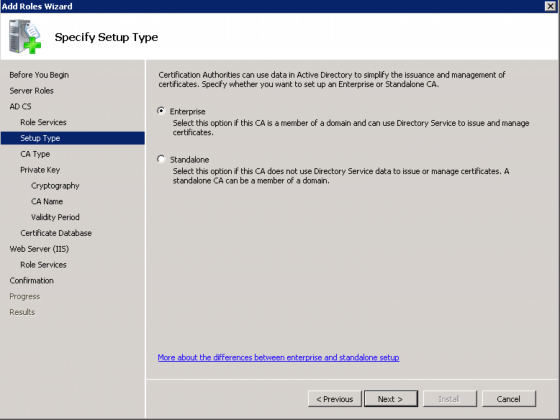
When prompted for which type of Certificate Authority to install, choose “Enterprise”.
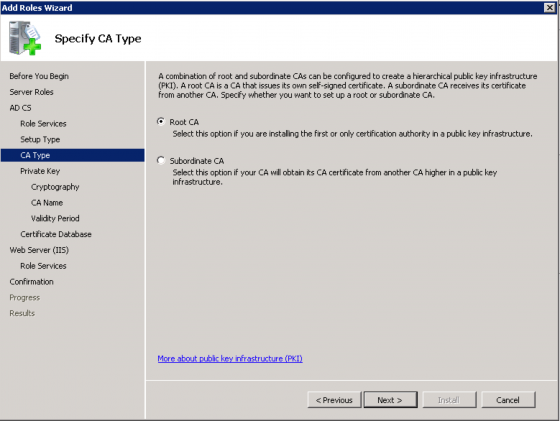
When prompted for CA Type, select “Root CA” and click “Next”.
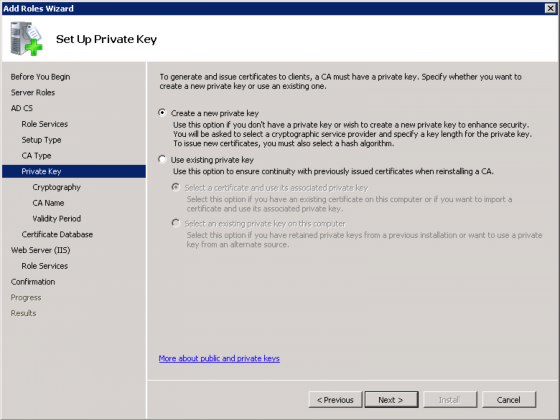
When prompted to Set Up Private Key select “Create a new private key” and click “Next”.
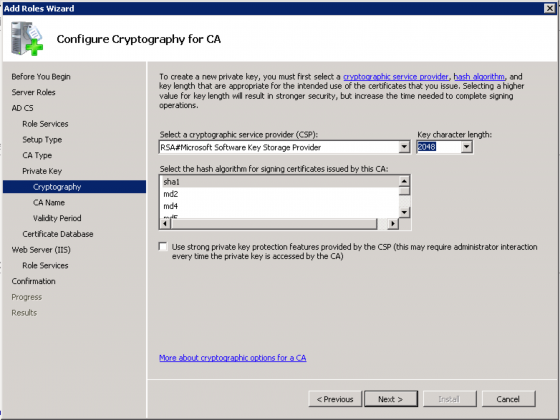
When prompted to Configure Cryptography for CA, accept the defaults and click “Next” for the rest of the conformation screens.
Request Certificates (optional)
Now that we have our Certificate Authority (CA) up and running we may want to request a certificate for our Authentication Server.
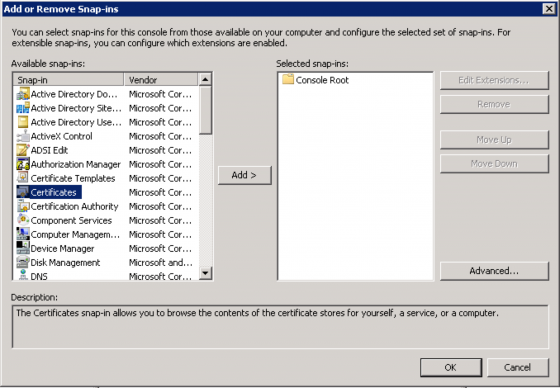
We’ll create a Microsoft Management Console (MMC) that will allow us to request and install the certificate for our server. Press the “Start” button and enter “MMC” in the command field to open the MMC. Next we’ll add the Certificate (For Local Computer) snap-in by clicking “File” and choosing “Add/Remove Snap-in”. Select “Certificates” and click “Add”.
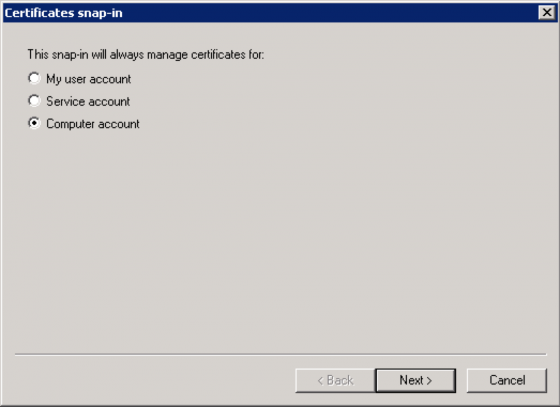
Now be sure to select “Computer Account” and click “Next”.
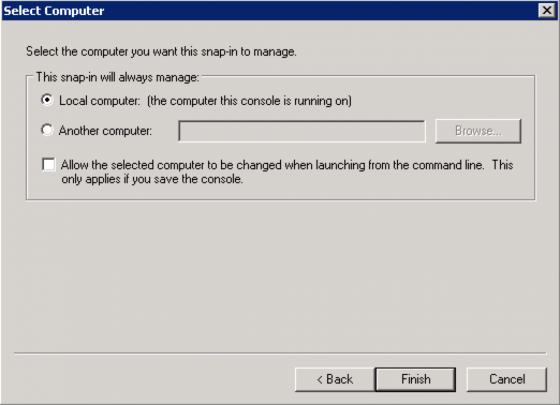
Choose “Local Computer”, click “Finish” and “OK”.
TIP: While you’re here you might as well add the “Certificate Authority” snap-in and save this MMC to your desktop because you’ll need it again in the future.
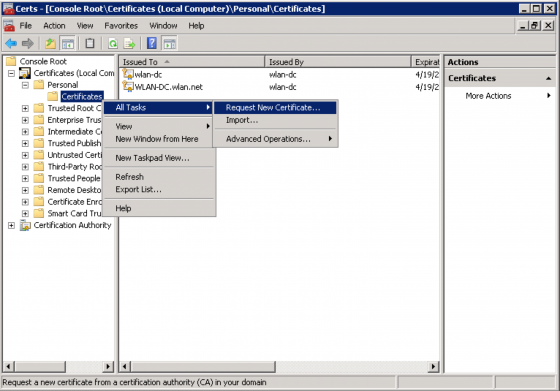
To request a certificate for your server (if you don’t want to use the default certificate) expand “Certificates (Local Computer Account)”, “Personal”, and right-click “Certificates” and select “All Tasks”, “Request New Certificate…”
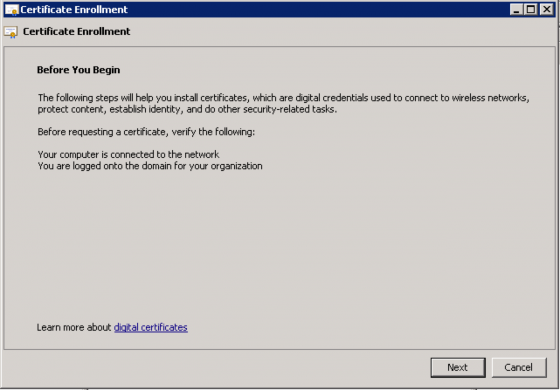
Click through the Enrollment screens choosing the settings you desire for your certificate.
Installing Network Policy and Access Services
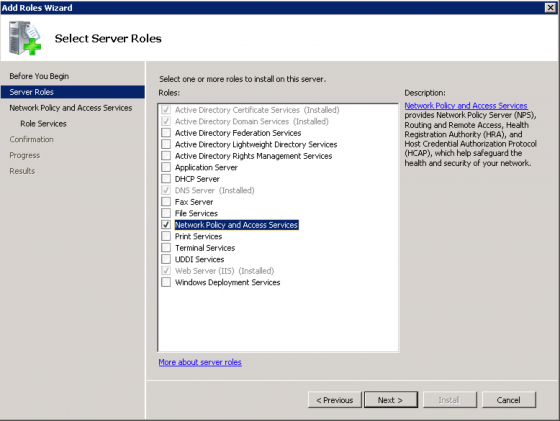
In Windows 2008 Server you can no longer just install the Internet Authentication Service (IAS) and have RADIUS functionality. You must now install Network Policy and Access Services, which now include everything from earlier versions of Windows server such as RRAS/IAS/etc,… but now includes NAP (think NAC for Windows). We will be installing and configuring just enough to enable PEAP and RADIUS functionality with our Aruba controller. So once again head to the Server Manager and “Add a Role” selecting “Network Policy and Access Services” and click through the confirmation screen.
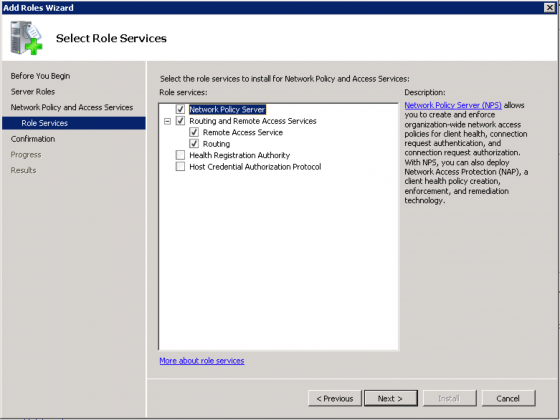
Select “Network Policy Server”, “Routing and Remote Access Services”, “Remote Access Service” and “Routing”. Click “Next”, click through the confirmation screen and click “Install”.
Installation will take a couple of minutes and present you with an install summery. Just click “Close”.
Now that NPS is installed, press the “Start” button and enter “nps.msc” in the command field. The NPS MMC should open up allowing you to select the “RADIUS server for 802.1X Wireless or Wired Connections” Installation Wizard from the “Standard Configuration” pull-down menu and click “Configure 802.1X”.
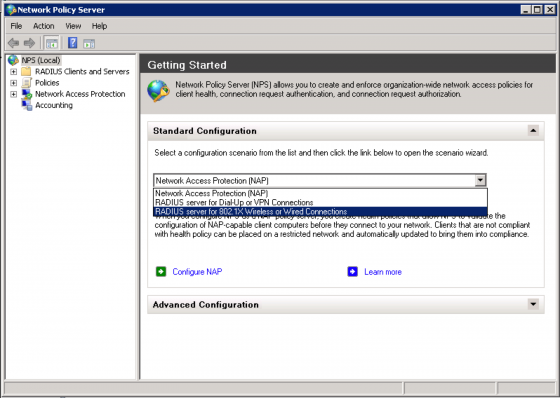
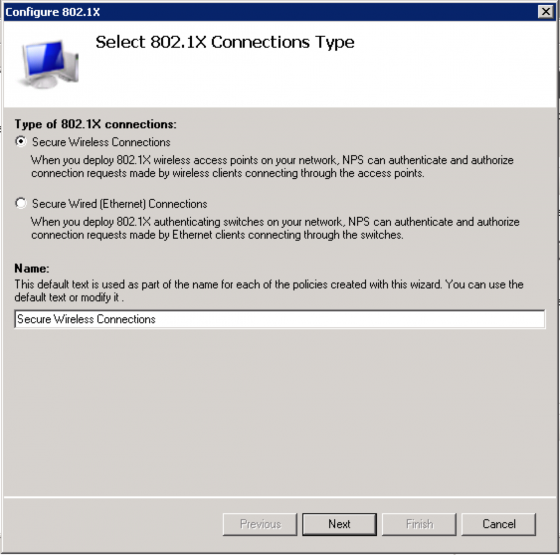
From the “Select 802.1X Connections Type” page, select “Secure Wireless Connections” and click “Next”.
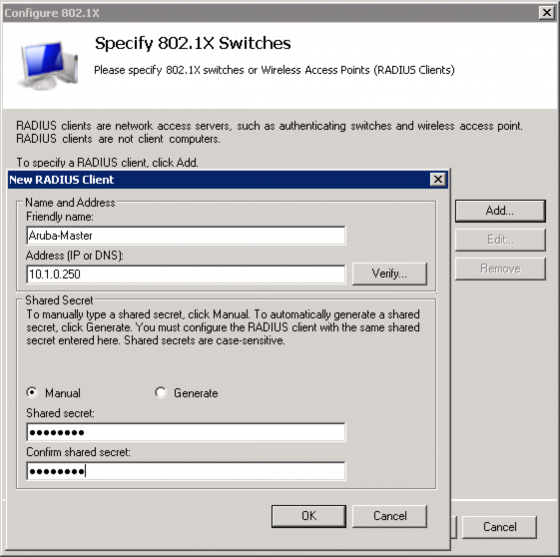
From the “Specify 802.1X Switches” screen click “Add…” and enter the settings for your Aruba controller and press “OK”.
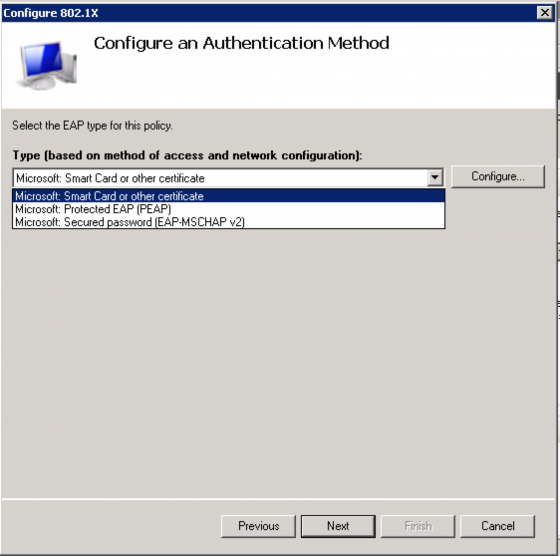
For the “Configure an Authentication Method” screen select “Microsoft Smart Card or other certificate” for EAP-TLS or “Microsoft Protected EAP (PEAP)” for PEAP. I will be selecting PEAP for this example and click “Configure…”
Select the appropriate certificate to use for this server. In this case we’ll use the “WLAN-DC.wlan.net” certificate and click “OK”.
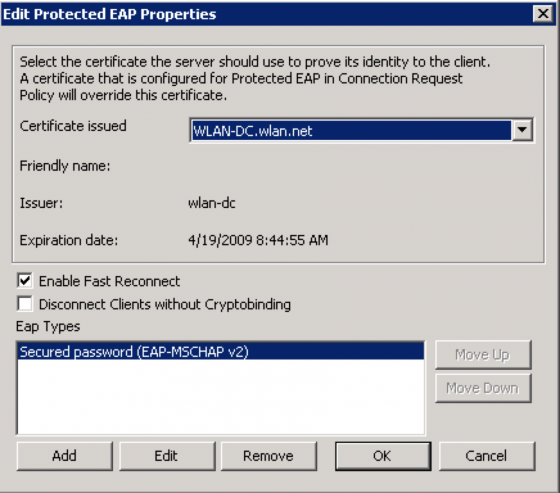
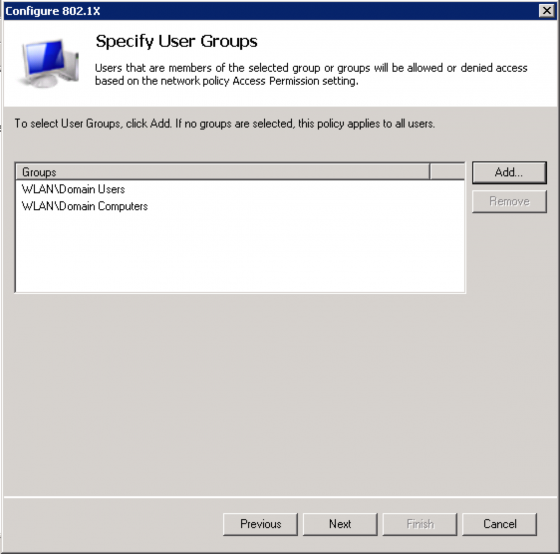
For the “Specify User Groups” screen select the users and/or groups you would like to allow wireless access. For this example I am allowing all of my domain users by selecting the “Domain Users” group. If I want to enforce Machine Authentication I need to add the “Domain Computers” group as well as checking the “Enforce Machine Auth” option in the dot1x policy on my Aruba controller. Click “Next” to continue.
Note: Groups listed here are considered as an OR statement.
For the next screen you can click “Next” and “Finish” or click “Configure…” to add RADIUS attributes for Server Derivation rules.
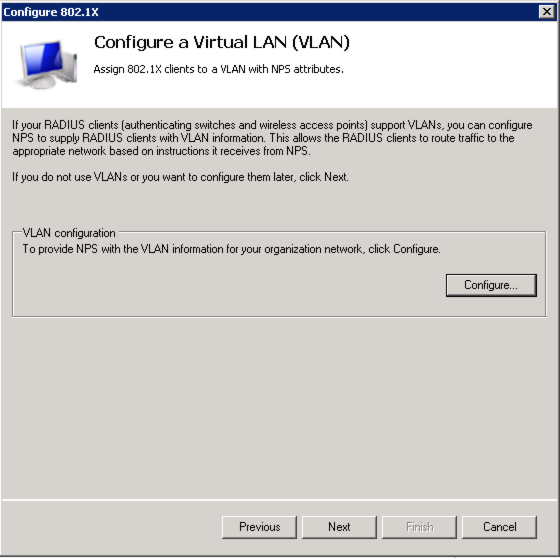
For example, you may want to map the “Domain Users” to the “employee_role” on your Aruba controller. You could do that here with the “Filter-Id” attribute.
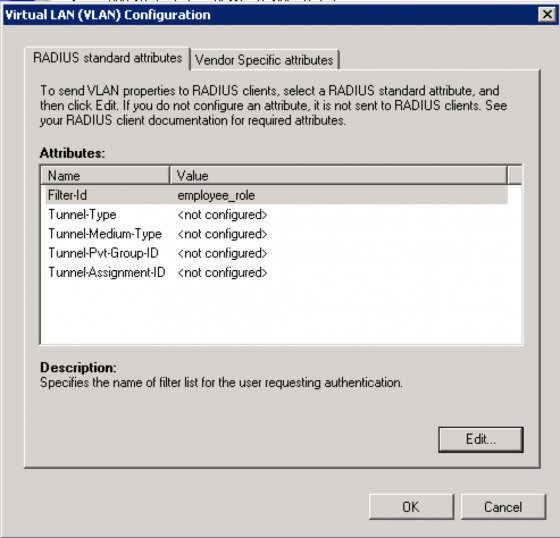
Note: There seems to be a bug in Windows if you mess with these attributes too much the “Filter-Id” attribute vanishes. If this happens cancel out of the wizard and start over.
Press “Next” and “Finish” to complete the wizard. This should now allow you to authenticate users against your Windows 2008 Server.
Got a project that needs expert IT support?
From Linux and Microsoft Server to VMware, networking, and more, our team at CR Tech is here to help.
Get personalized support today and ensure your systems are running at peak performance or make sure that your project turns out to be a successful one!
CONTACT US NOW

