The Dynamic Host Configuration Protocol for DHCP server is responsible for assigning the IP addresses to the client computers automatically. The client computers to which the DHCP server automatically assigns the IP addresses are the ones that are configured to obtain the addresses automatically. In other words, when a client computer is configured to obtain the IP address automatically, it is the DHCP server that assigns the IP address to the computer.
Since the client computer that is configured to obtain the IP address from the DHCP server sends a request to the server to assign an IP address to it, the client computer is technically called the DHCP client.
At the DHCP server end, you, as a DHCP administrator, must configure the DHCP server with the appropriate IP address range that you want to be assigned to the client computer. A proper planning of the IP addresses and the subnet is very important before you configure the DHCP server in your organization. In case you fail to plan the IP addressing scheme properly, you may end up having a DHCP server with incorrect IP address range which, when automatically assigned to the client computers, would keep them from communicating with the other computers in the network.
Here is how you can configure the DHCP server:
Assuming that you are logged on to the Windows Server 2012 with the default Administrator account, and have followed the well-known procedure to install the DHCP Server role on the computer, you must:
- Make sure that the Server Manager window is open.
- From the left pane, click to select the DHCP category.
- From the right pane, under the SERVERS section, make sure that the target DHCP server is selected in the displayed list.
- Click the More button present at the right corner of the yellow bar available at the top of the list.
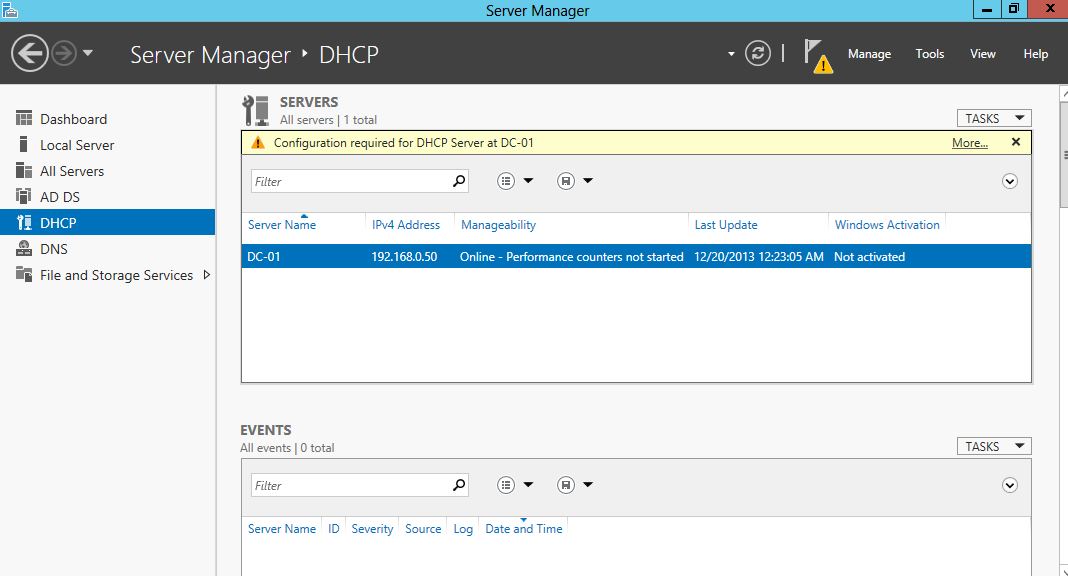
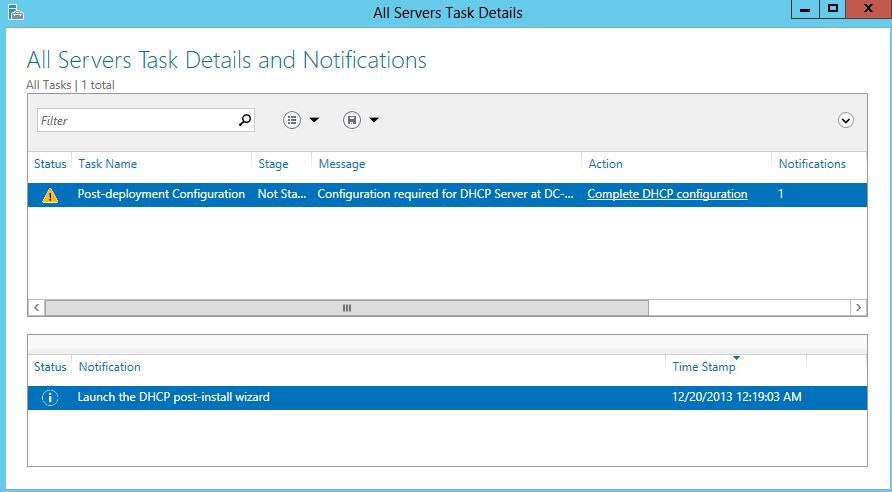
- On the opened All Servers Task Details box, from the displayed DHCP server list, click the Complete DHCP configuration option under the Action column.
- From the opened DHCP Post-Install configuration wizard box, on theDescription window, read the description carefully and click Next to proceed to the next step.
- On the Authorization window, make sure that the Use the following user’s credentials radio button is selected, and the correct username (the domain administrator account of the computer) is displayed in the User Name field. (In case the DHCP server is not the member of a domain, you can click to select theSkip AD authorization radio button.).
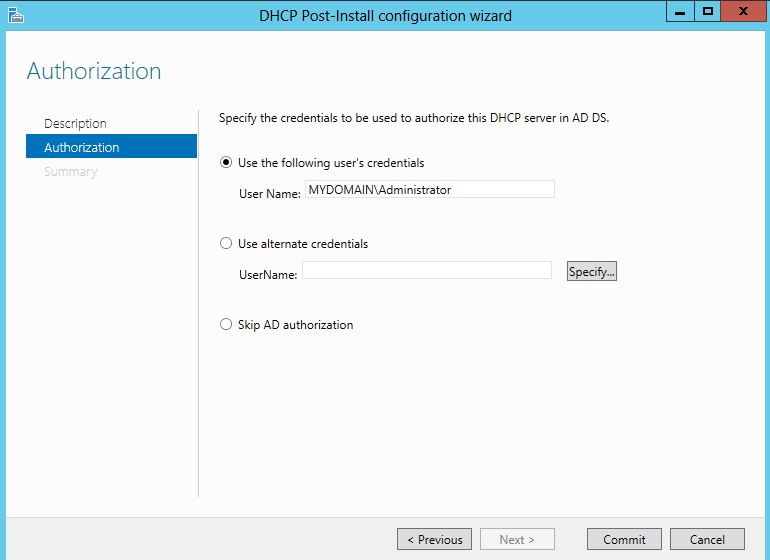
- Once done, click the Commit button.
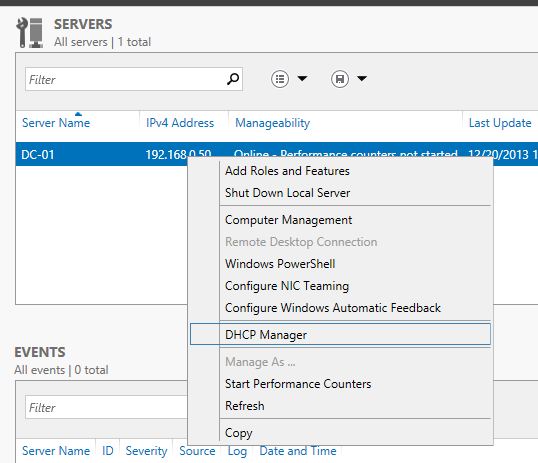
- Back on the Server Manager window, right-click the DHCP server in theSERVERS list from the DHCP category.
- From the displayed context menu, click the DHCP Manager option.
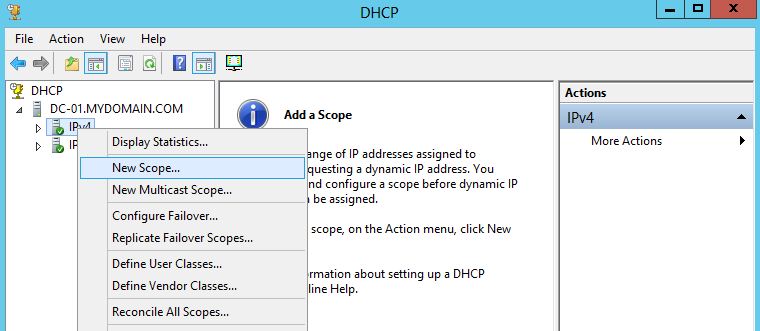
- On the opened DHCP snap-in, from the left pane, expand the server name.
- From the displayed tree, right-click IPv4, and click New Scope.
- On the New Scope Wizard welcome screen, click Next.
- On the Scope Name window, type a new name and a brief description about the DHCP scope in the Name and Description fields respectively.
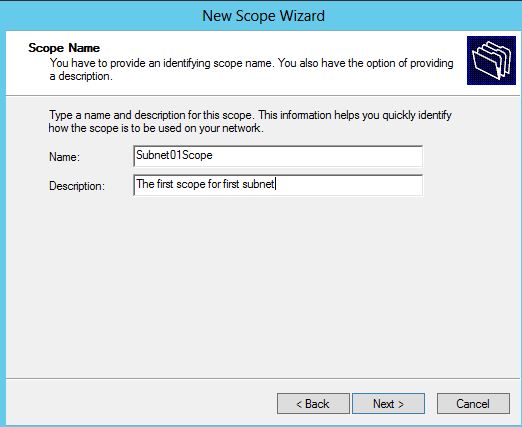
- Click Next to proceed further.
- On the IP Address Range window, in the Start IP address and End IP addressfields, type the first and last address of the entire IP address range respectively that you want the
DHCP server to assign to the DHCP client computers.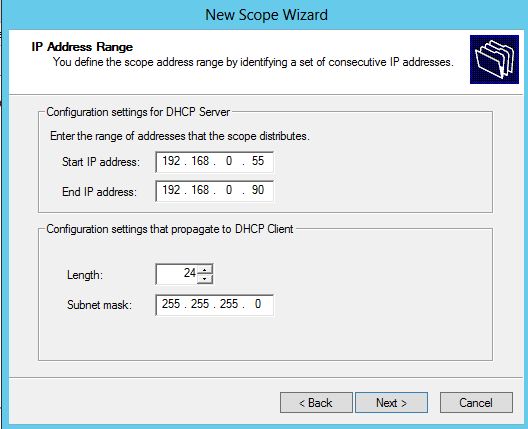
- Click Next to continue.
- On the Add Exclusions and Delay window, leave everything as default and clickNext.
- On the Lease Duration window, leave the default settings intact for now and clickNext.
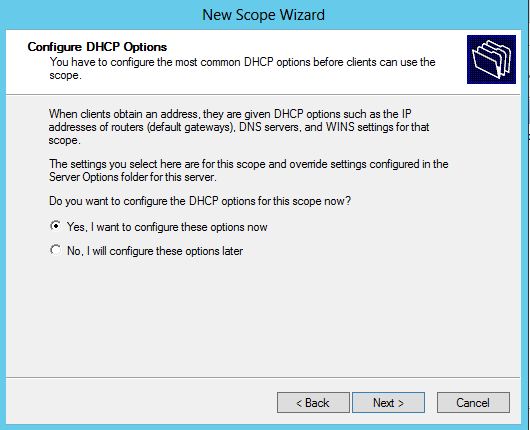
- On the Configure DHCP Options window, make sure that Yes, I want to configure these options now radio button is selected, and click Next.
- On the Router (Default Gateway) window, in the IP address field, type the IP address of the router that is used as the default gateway for the local network, and click Add to add the address to the list.
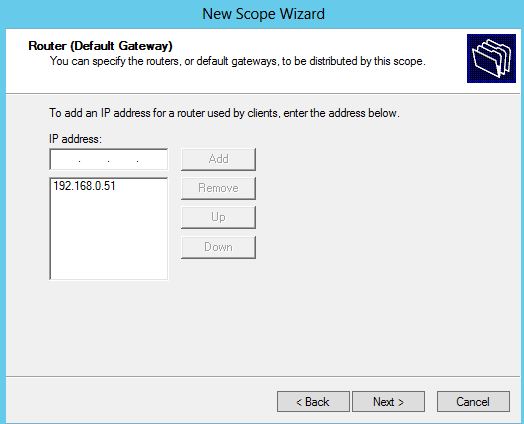
- Click Next to continue.
- On the Domain Name and DNS Servers window, make sure that the IP address of the DNS server is displayed in the IP address list, and click Next. (If the IP address is not listed,
you can add it manually.).
- On the WINS Servers window, click Next leaving everything as default.
- On the Activate Scope window, make sure that the Yes, I want to activate the scope now radio button is selected, and click Next.
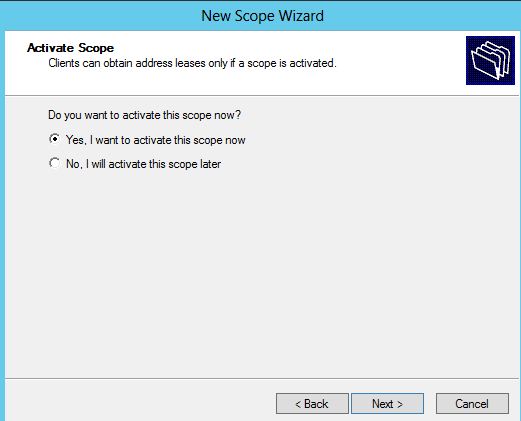
- On the final window, click Finish to complete the new scope creation and activation process.
Got a project that needs expert IT support?
From Linux and Microsoft Server to VMware, networking, and more, our team at CR Tech is here to help.
Get personalized support today and ensure your systems are running at peak performance or make sure that your project turns out to be a successful one!
CONTACT US NOW

